How to Delete Duplicate Files on Android?
Duplicate files are the most common reason for running out of storage space on your smartphone. With Duplicate Files Fixer you can easily detect these unwanted files and remove them to recover space. This professional tool to find duplicates looks beyond the file name. To learn how to use Duplicate Files Fixer, follow the instructions given below:
Step 1.
Download & Install Duplicate Files Fixer
To get started, download Duplicate Files Fixer from Google Play Store or can click the button given below:
Step 2.
Set your Scan Mode
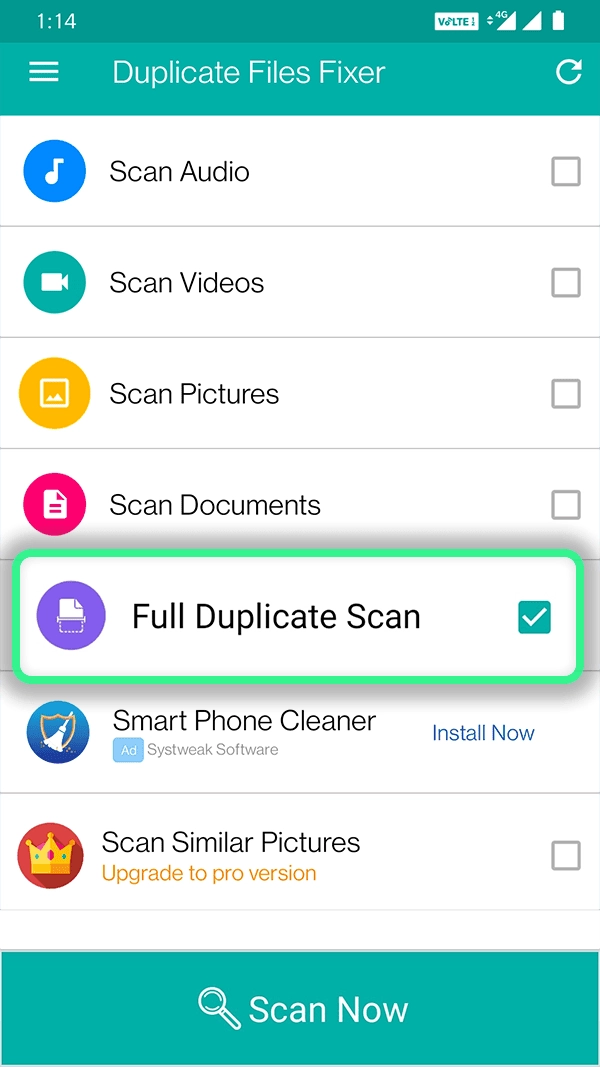
Launch Duplicate Files Fixer to scan for duplicates. Select the preferred scanning based on how in-depth you want the scan to be. To search the device for all types of duplicate files, tap Full Duplicate Scan. However, to scan for specific files select the option as per your requirement.

Step 3.
Search for Duplicate files
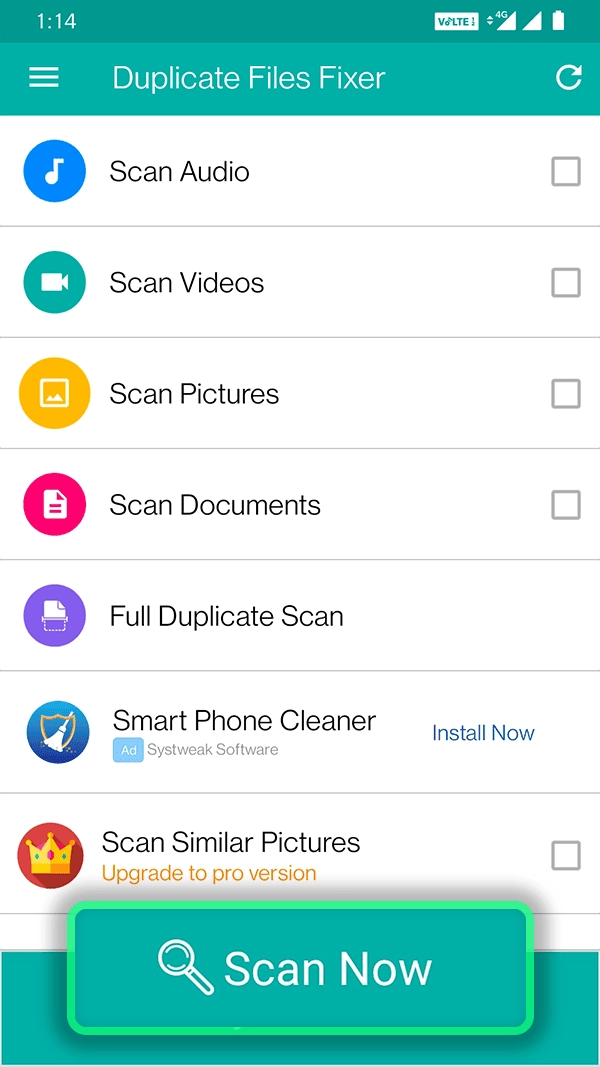
After selecting the scanning mode tap the Scan Now option. Thereafter, tap Allow to grant access to Duplicate Files Fixer to scan the device for photos, media, and files stored. Now, wait for the scanning process to complete. Depending upon the number of files to be scanned the scanning process might take a little while.

Step 4.
Preview results and Delete Duplicate Files
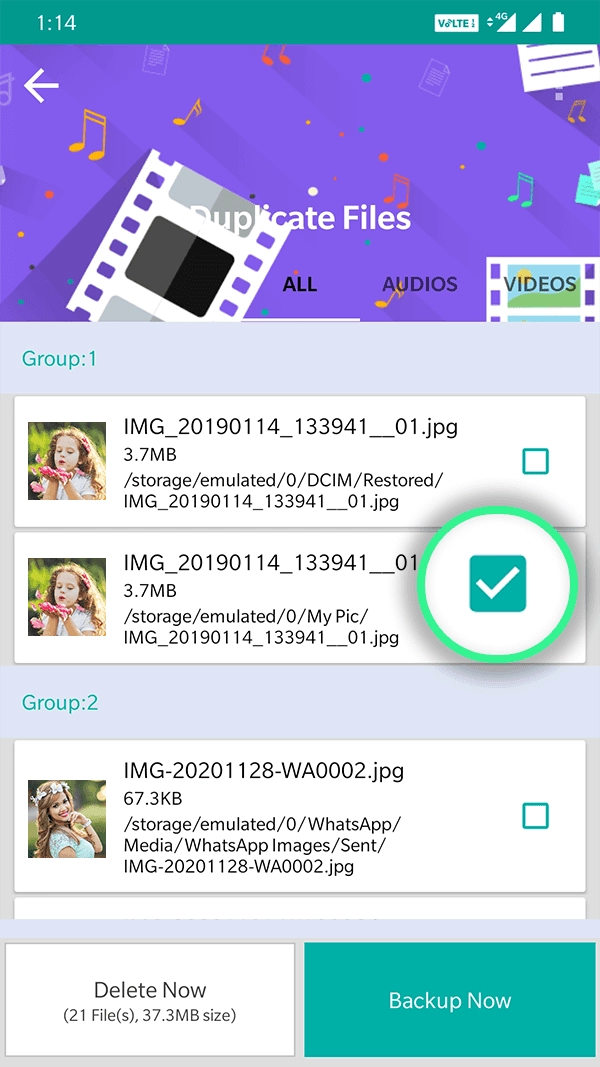
When the scanning is done, review the list of duplicate files categorized into All, Audios, Videos, Pictures, and Documents. Preview the identified duplicate photos and review duplicate files. Duplicate Files Fixer automatically selects duplicates leaving one copy in each group unmarked. If you want you can change it.

Step 5.
Remove Duplicates in One Click
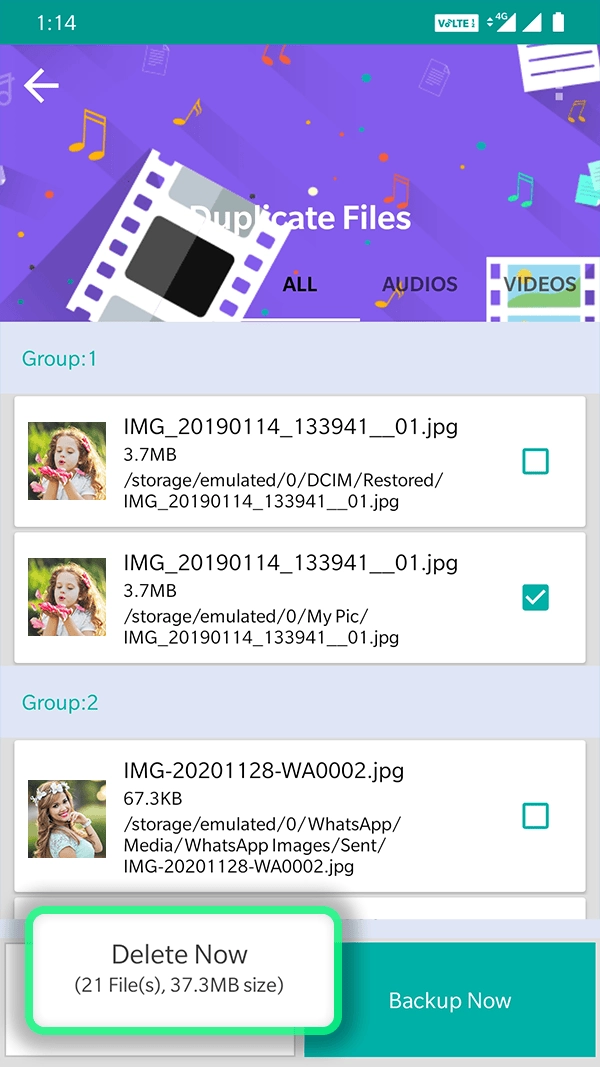
Now that the duplicate files are selected when you’re ready tap Delete Now. Confirm the action by clicking Ok, and wait for the process to finish. You will now get a summary of the space recovered after deleting duplicates.


Done

